
Stripe
To configure the Stripe Gateway in your sticky.io platform, follow these steps.
Navigate to the Gateways Section:
- In the left-hand menu, click on Gatewayssection.
- This will open the Gateway Profile page, where you can manage your existing gateway connections.
Add a New Gateway:
- Click the + Add Gateway button located at the top-right corner of the Gateway Profile page.
- A pop-up window will appear, displaying various gateway options.
Select Stripe:
- From the list of gateways, select Stripe. You will be taken to a configuration page where you can input the required information.
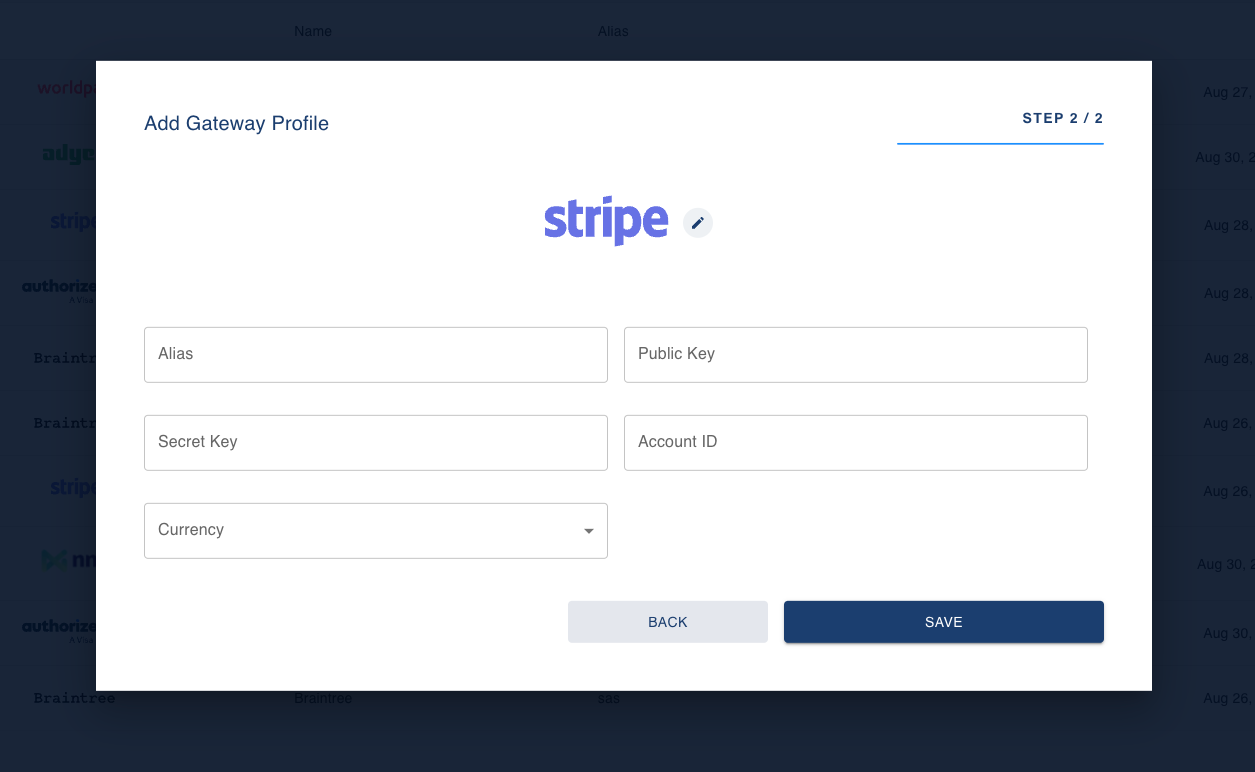
Fill in the Required Fields:
- Alias: Enter a unique name for this gateway profile. This helps you easily identify the gateway in your system.
- Secret Key: Input the secret key provided by Stripe to authenticate transactions.
- Public Key: Input the public key associated with your Stripe account.
- Account ID: Enter your Stripe account ID for identification purposes.
Save the Configuration:
- After filling in the required fields, click Save to complete the setup.
- The new gateway profile will be added to the Gateway Profiles list, and its status will be displayed as either Active or Inactive depending on its configuration and activation.
Updated 10 months ago
Did this page help you?